A good buyer checklist does not start at the front door of the first tour. It starts earlier, with the money, the paperwork and the priorities that decide whether a tour can become an offer. Below are 12 finished buyer checklist posts in buying order, plus the one page checklist the whole series points to.
Answer, up front: post the buyer checklist as a short series, not a single long post. One step per post, in the order a real purchase runs: numbers first, pre-approval second, touring third, the offer and closing last. Each post is written buyer first, in plain language, with no promise about price, timing or approval.
Buyers choose an agent while they are still saving and scrolling, often months before the first tour. Listing posts show homes. A clear checklist shows how you guide a purchase. Past clients forward a good one to friends about to start.
Before the first tour: steps 1 to 4
The first four steps happen before anyone books a showing. They feel slow, and they are why the rest of the purchase can move quickly when the right home appears.
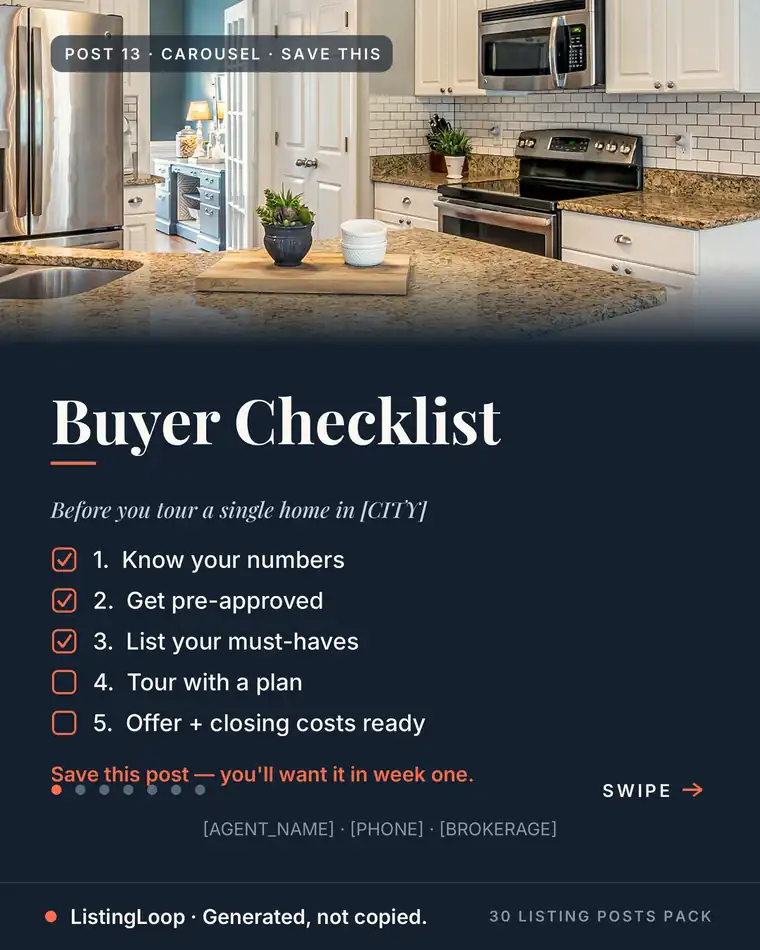
Buyer step 1: know your numbers before you tour. Write down three numbers: what you can put down, the monthly payment you can carry comfortably, and the cash you need to keep back after closing. A home you love at a payment you fear is not a bargain. The comfortable number is the one that steers the search.
Buyer step 2: get pre-approved, not just pre-qualified. A pre-qualification is an estimate based on what you tell a lender. A pre-approval is a checked file, and sellers read it that way. Get the checked version before you tour seriously. On a busy weekend, that difference decides whose offer gets read first.
Buyer step 3: list must-haves separately from nice-to-haves. Write two lists before the first tour: the things a home must have for daily life to work, and the things you would enjoy if they came along. Tour against the first list. Judge photos against the second. Mixing them is how good homes get skipped for small reasons.
Buyer step 4: set a closing costs folder from day one. The price is not the whole purchase. Lender, title, tax and insurance costs sit around it, and your lender can estimate them early. Ask for that estimate in writing, keep every document in one folder, and update the folder each time a number changes.
Skip the blank caption box
The free Listing Post Generator writes this exact kind of post from your listing details: your city, your numbers, your name, in about 20 seconds. Caption 1 is instant; all three captions plus hashtag sets unlock with an email.
Try the free generator →Touring and choosing: steps 5 to 8
Steps 5 to 8 turn touring from a weekend hobby into a decision process. The goal is not more homes. The goal is clearer notes on fewer, better matched homes.
Buyer step 5: tour with a plan, not a scroll. Pick a small set of homes that match the must-have list, tour them together, and take the same photos and notes at each one. Write one honest sentence per home before you leave the street. Memory blurs by the third kitchen; notes do not.
Buyer step 6: check the costs a photo cannot show. Ask about the age of the roof and main systems, utility costs where the seller shares them, and any association fees and what they cover. Together, these numbers explain what owning the home will cost each month.
Buyer step 7: visit the street at a second time of day. A quiet street at noon can be a busy route at rush hour, and a dark street at night reads differently from a bright one at a weekend showing. Go back once, at a time you would actually live there. Ten minutes answers questions no listing photo can.
Buyer step 8: name your deal-breakers before you need them. Decide in advance what would make you walk away: a major repair, a layout that cannot change, a commute you will not accept. Write the list while you are calm. In a fast offer moment, the calm version of you is the best adviser in the room.
Offer, contract and closing: steps 9 to 12
The last four steps cover the part buyers control least: other people, paperwork and deadlines. A calm process, explained early, is most of the agent value here.
Buyer step 9: make the offer on the whole terms, not only the price. Deposit, contingencies, closing date and proof of funds all shape what an offer is worth to a seller. Decide your limits on each term before you sign. A clear offer, inside calm limits, beats a frantic one you regret.
Buyer step 10: treat the inspection as a priced list, not a verdict. An inspection rarely finds nothing. It lists what the home needs, in rough order. Negotiate the major items, plan for the minor ones, and use your deal-breaker list before you use your emotions.
Buyer step 11: keep your money still between contract and closing. Do not open new credit, move large sums without telling your lender, or buy the furniture before the loan is final. Lenders check the file again before closing. A quiet, documented money trail is how a signed contract becomes keys.
Buyer step 12: do the final walkthrough like it matters, because it does. Visit the home shortly before closing. Run the water, test lights and heating, check agreed repairs, and confirm nothing has changed since the inspection. Photograph meter readings and any issue on the spot. Problems are easier to solve before signing than after.
The one page buyer checklist the series points to
Every step above compresses into one page a buyer can keep on a phone. Share it as the final post when a past client mentions a friend who is starting to look.
- •Before touring: down payment, comfortable monthly payment and reserve cash written down, plus a lender pre-approval in the folder.
- •Before choosing: must-haves separated from nice-to-haves, deal-breakers named, and tour notes taken the same way at every home.
- •Before offering: closing cost estimate read, deposit and terms decided, proof of funds ready to share.
- •Before closing: inspection items handled in order, money kept still and documented, final walkthrough booked.
How to post the series without overwhelming new buyers
Run one step a week for twelve weeks, or one a day across a two week buyer season. Keep the order: an inspection post helps nobody who has not read the pre-approval step. Slot real listings between the steps, using the just listed format, and the weekly content system to hold the rhythm. When a buyer closes, the just sold captions tell the end of the story.
Writing twelve steps from a blank page is the slow version. The listing posts around the series do not need hand writing: the free Listing Post Generator turns listing details into finished captions in about 20 seconds, in the same property first style.
Frequently asked questions
What is the first step on a home buyer checklist?
Know your numbers and get pre-approved. A written down payment, a comfortable monthly payment and a checked lender file turn casual scrolling into a search that can actually end in an offer.
How long does the buying process take once you start?
It varies by market, lender and home, so no honest checklist promises a number of days. What you control is readiness: documents in one folder, decisions made early, deadlines answered on time.
Should buyers tour homes before pre-approval?
A casual open house visit is harmless. Serious touring without pre-approval usually wastes the tour: you cannot judge what a home costs you, and a seller may not take an offer from an unchecked file seriously.
What should a buyer never do before closing?
Change the money picture without telling the lender. New credit, large unexplained transfers and big purchases can all delay or derail a closing, because the lender checks the file again before funding.
What should a buyer checklist never promise?
Approval, timing or a price outcome. A checklist can promise order: what to prepare, in what sequence, and who confirms each figure. The lender confirms approval, and the contract sets the dates.
Use the twelve posts as they stand, with your city and your lender details swapped in. The designed version of this checklist is the Buyer Checklist carousel in the finished post library shown on our templates page, listed on the pricing page.
Want the month done for you?
The 30 Listing Posts Pack: a full month of posts, finished graphic, written caption, hashtag set and posting prompt on every one. $17, one time. No subscription.
Want to use these examples with a real listing?
Create a draft